How to Fix Flat Image to 3D Results
Getting flat, pancake-like 3D models from your images? Here's a simple solution that works every time.
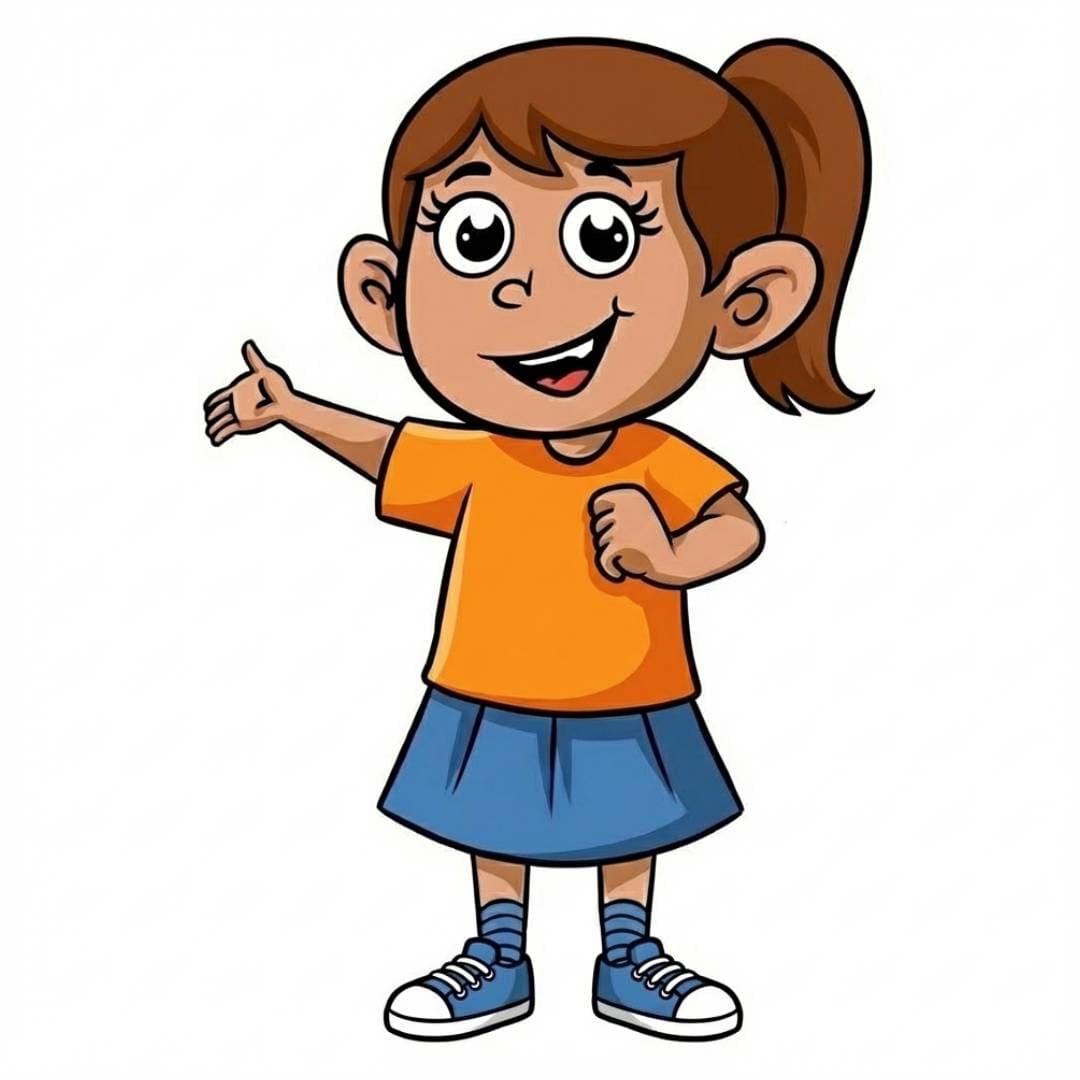
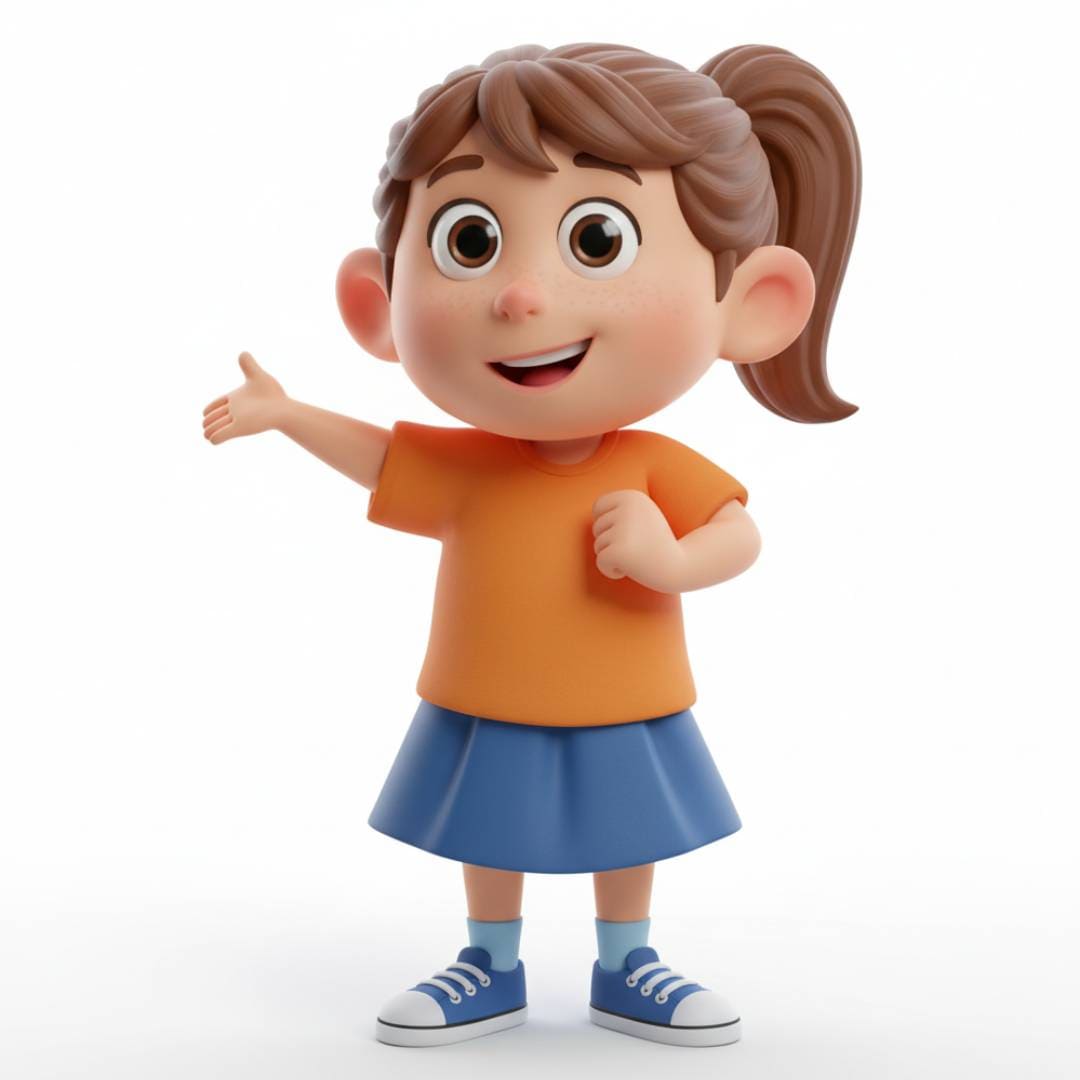
Before: Flat clipart
After: With depth added
Before: Flat artwork
After: With depth added
Before: Flat illustration
After: With depth added
Before and after using "Edit with AI" - notice the dramatic difference in depth and dimension
One of the most common issues when converting images to 3D is getting a model that looks like a flat cutout or cardboard silhouette instead of a proper volumetric object. This typically happens when you're working with illustrations, drawings, or 2D concept art.
The good news? There's a straightforward fix that takes about 2 extra minutes and dramatically improves your results.
Why This Happens
When you upload a flat illustration or 2D drawing to an image-to-3D tool, the AI interprets exactly what it sees: a two-dimensional image. Without depth cues like shadows, highlights, or perspective, the AI can't infer where things should be thick or thin, what should protrude, or what should recede.
The result is a 3D model that's technically three-dimensional, but incredibly thin - essentially your 2D image with minimal thickness added. It looks more like a cookie cutter than an actual object.
The Solution: Edit with AI First
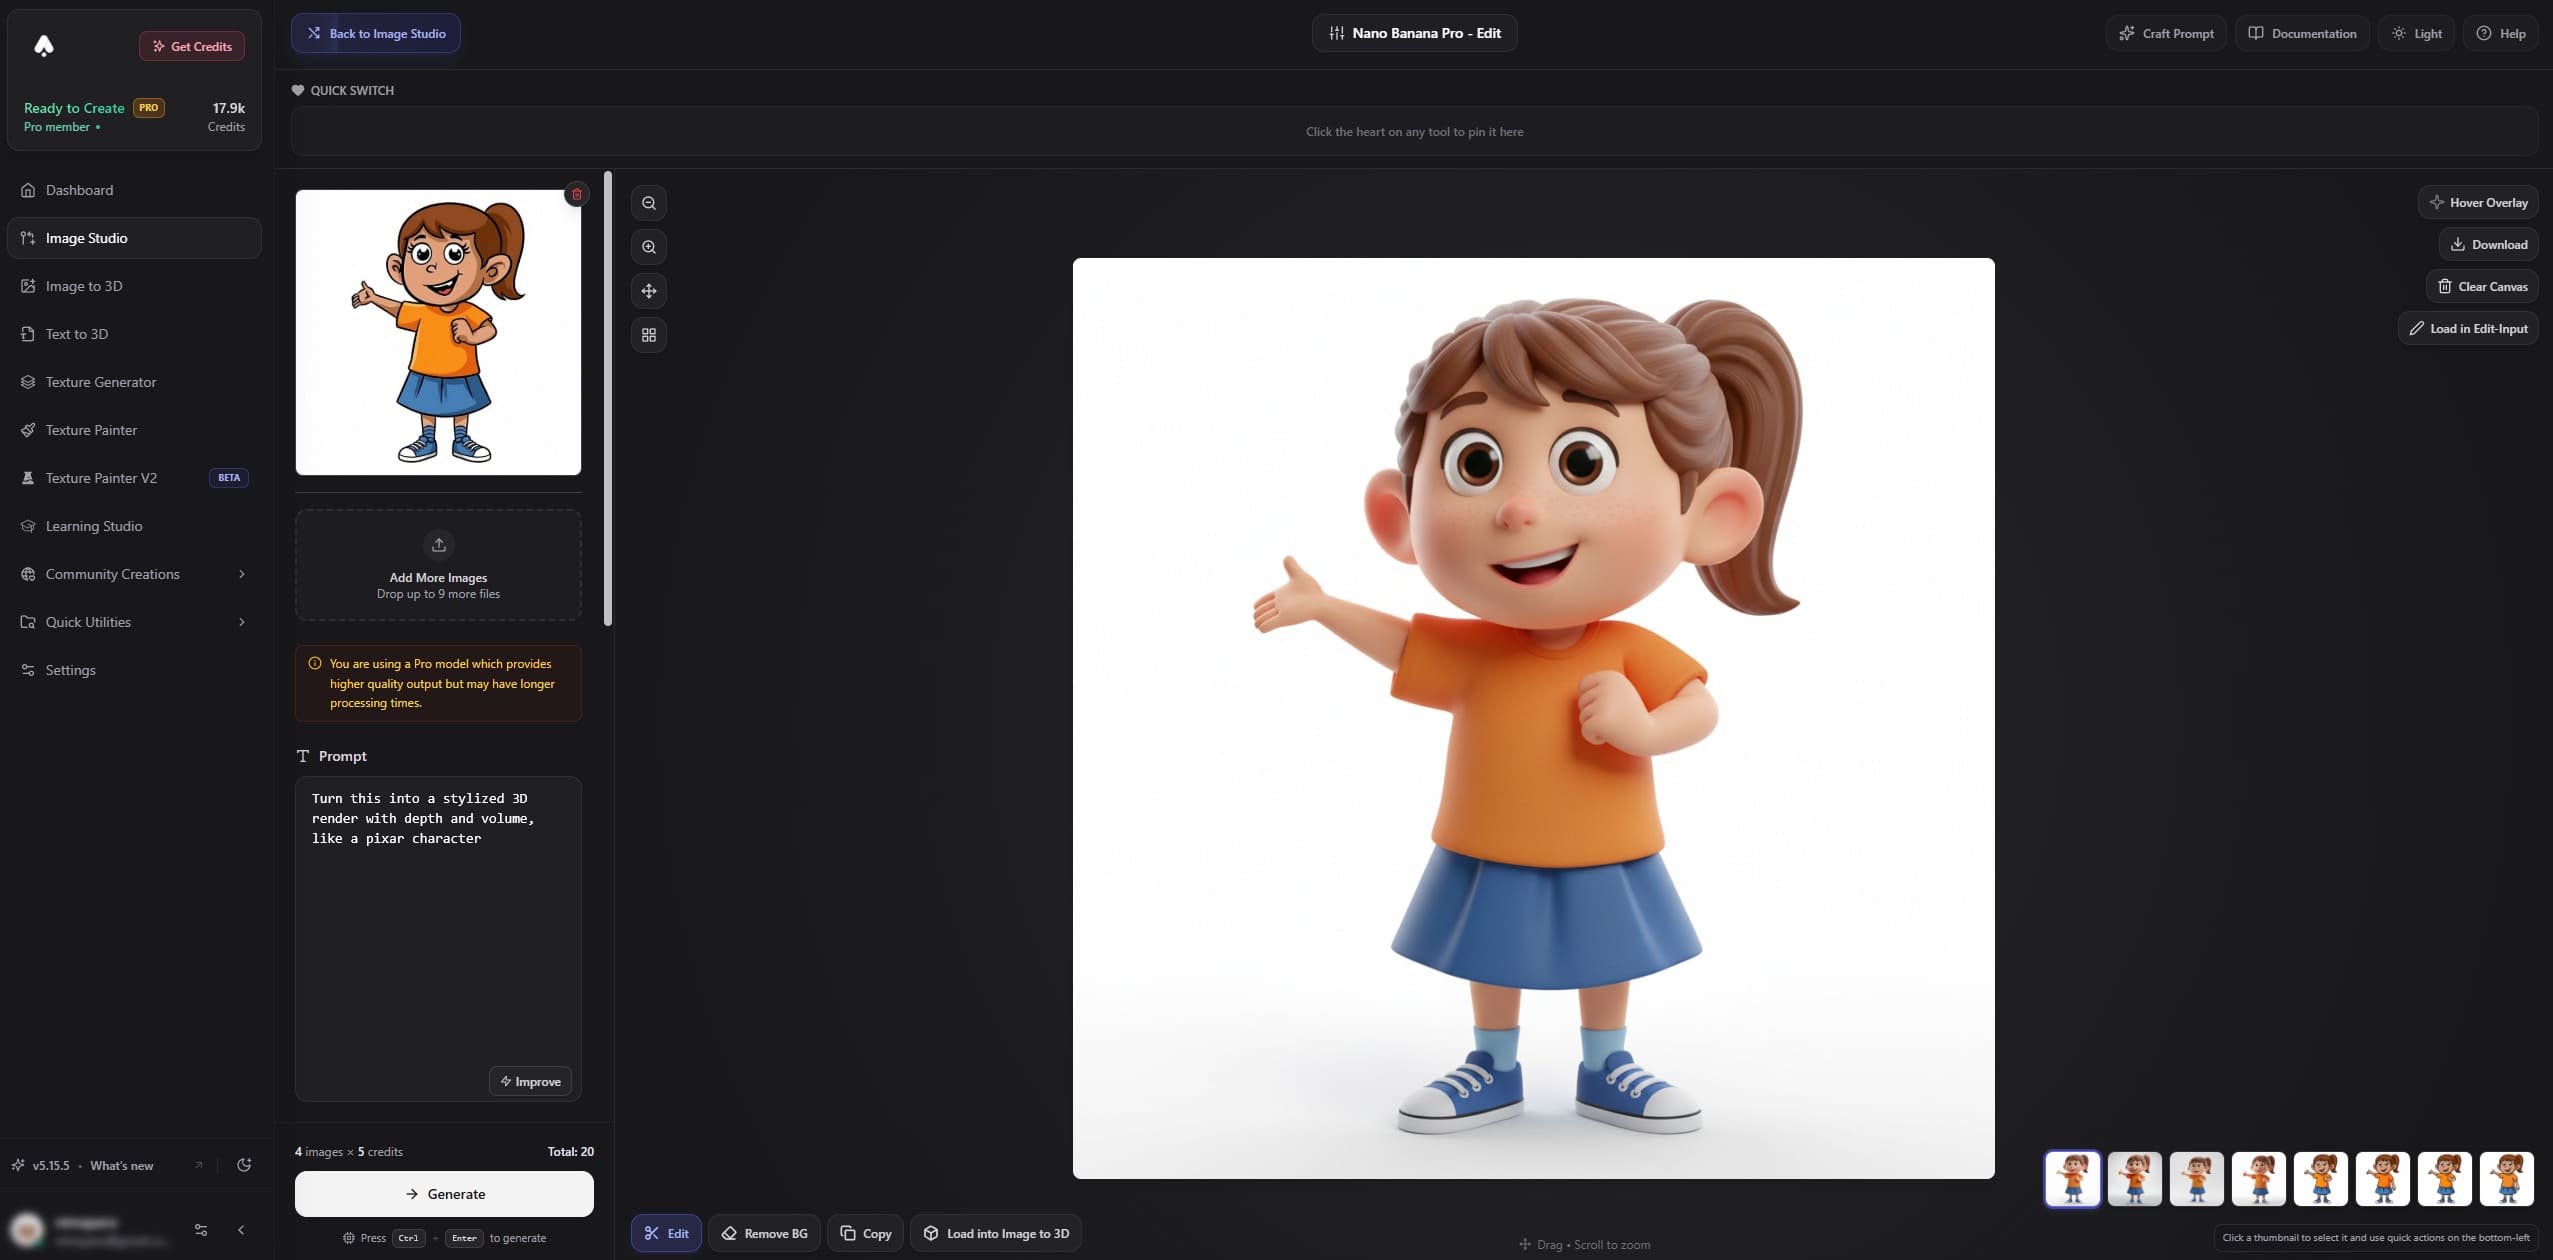
Instead of directly converting your flat image to 3D, we need to give the AI the depth information it's missing. The key is using the "Edit with AI" button to transform your flat image into what looks like a stylized 3D render before running the 3D conversion.
This intermediate step adds the visual depth cues - shadows, highlights, dimensional lighting - that the 3D AI needs to create a proper volumetric model.
Step-by-Step Guide
1. Upload Your Image
Start by uploading your flat illustration, drawing, or 2D artwork to the Image to 3D tool. Don't click the generate button yet - we'll edit it first.
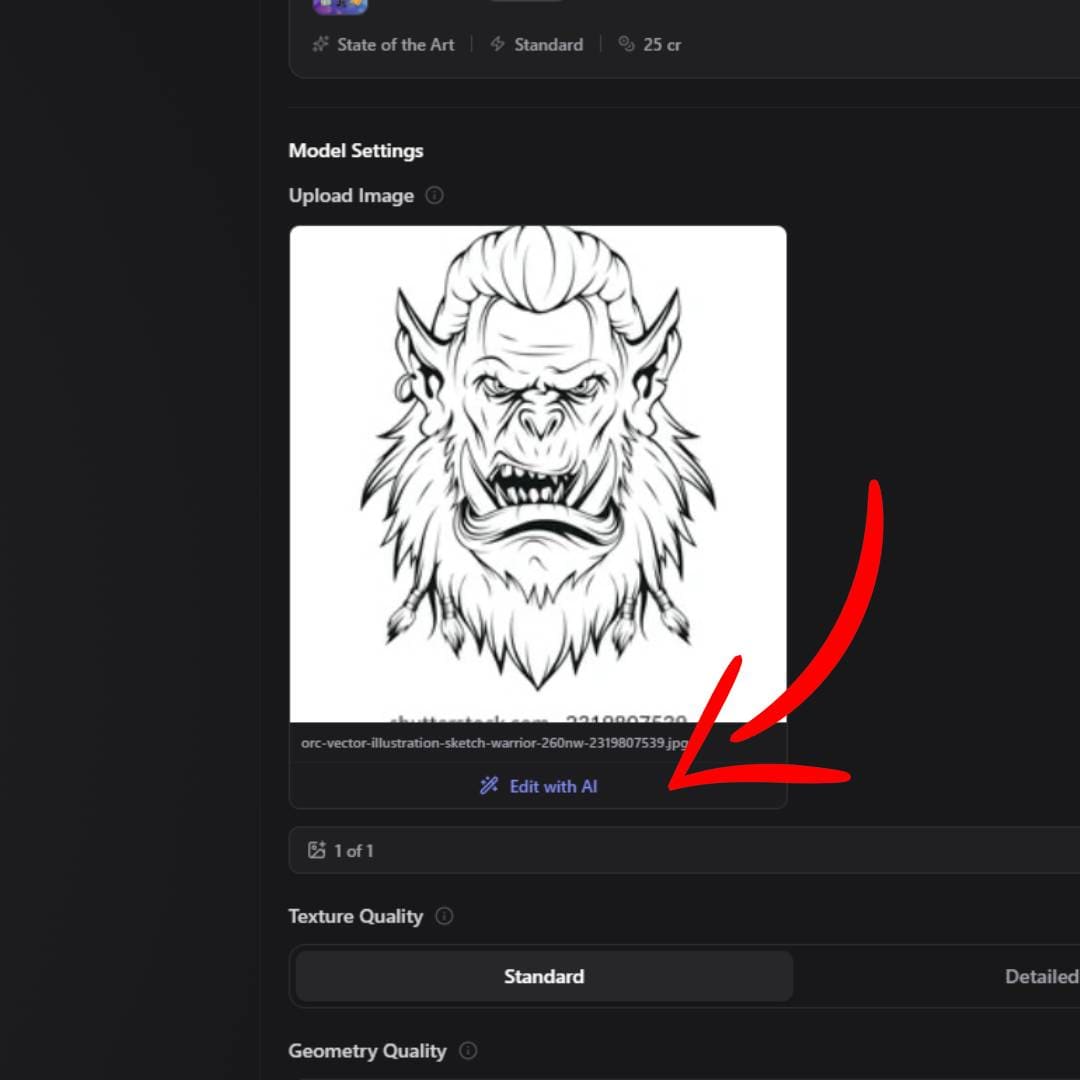
The Image to 3D upload interface
2. Click "Edit with AI"
After uploading, look for the "Edit with AI" button near your uploaded image. This opens our AI image editing tool which we'll use to add depth to your flat image.
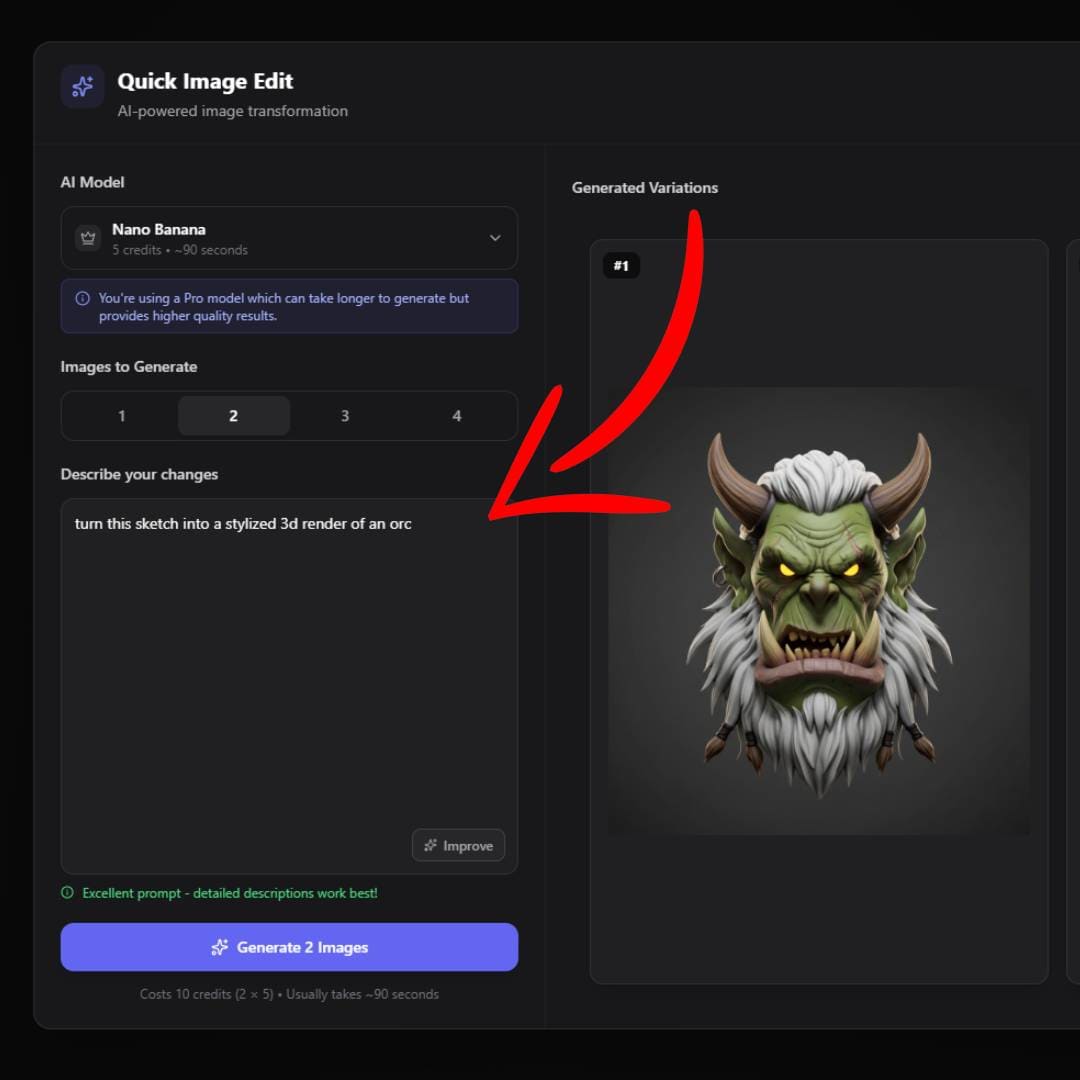
The "Edit with AI" button location after uploading your image
3. Tell the AI to Add Depth
In the editing prompt box, tell the AI to transform your image into a stylized 3D render. Here are some prompts that work well:
Example prompts:
The key words are "3D render," "depth," "volume," and "dimension." These tell the AI to add the visual characteristics of a three-dimensional object.
Pro Tip
You can choose which AI model to use for editing in the model selection dropdown. Nano Banana Pro produces the best results for adding depth and dimension, but it's slower. For faster results, try Gemini Edit or SeedEdit.
You can also use the dedicated edit tools in the Image Studio directly, then upload the edited image to Image to 3D.
4. Generate the Edited Image
Click generate and wait 15-30 seconds. The AI will transform your flat image into something that looks more dimensional with added shadows, highlights, and depth cues.
5. Use the Edited Image for 3D Generation
Now use your newly edited image (not the original flat one) to generate the 3D model. The 3D AI will have the depth information it needs to create a proper volumetric model instead of a flat cutout.
Dedicated Edit Tools
Need more control? Edit images directly in our Image Studio.
Gemini Edit
FastQuick and reliable edits. Best when you need results in seconds.
Nano Banana Pro
High QualityPremium results with advanced resolution control. Worth the extra wait.
Real Examples
Here are three examples showing the difference this technique makes. For each, you'll see the transformation from flat image to dimensional image, and then how that affects the final 3D output.
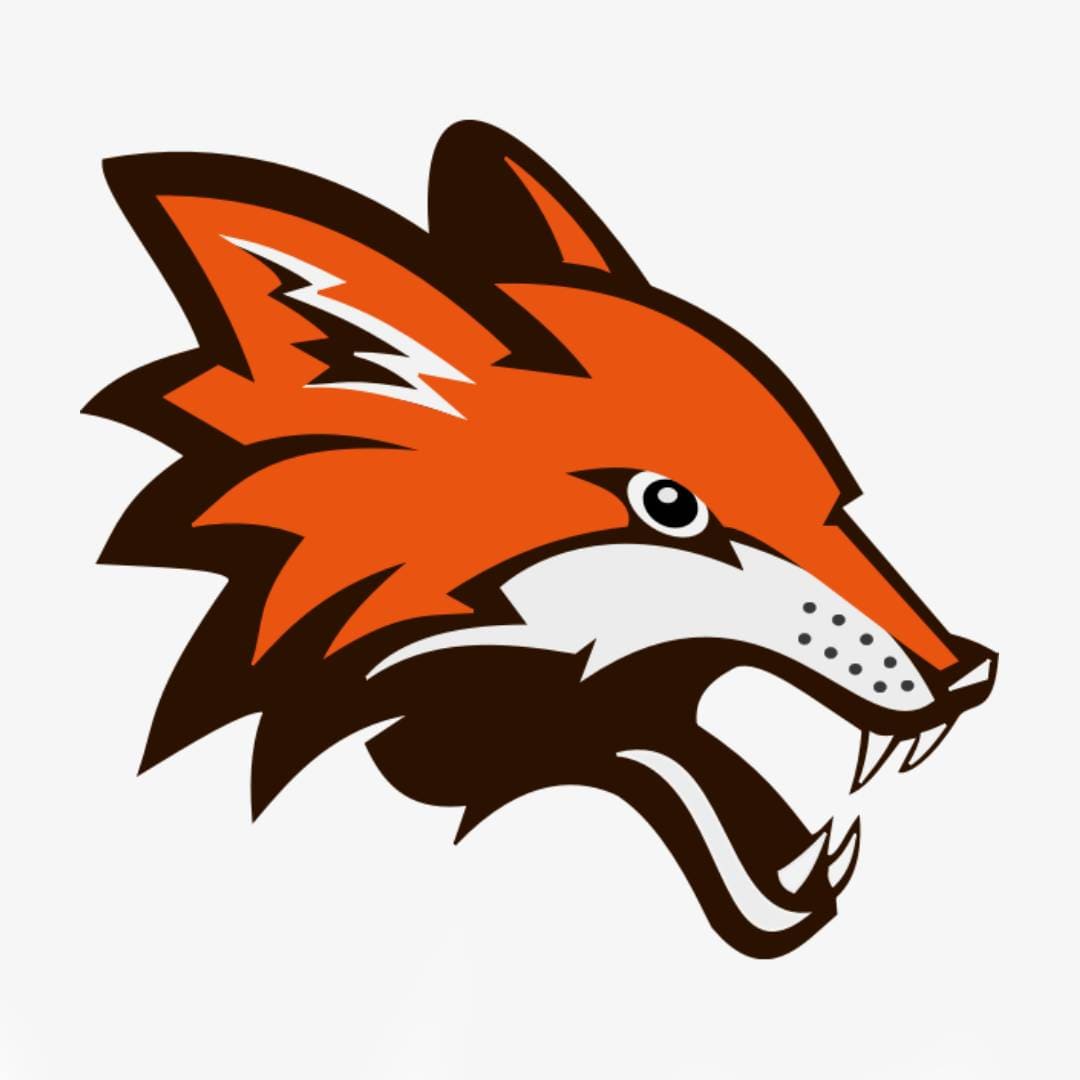
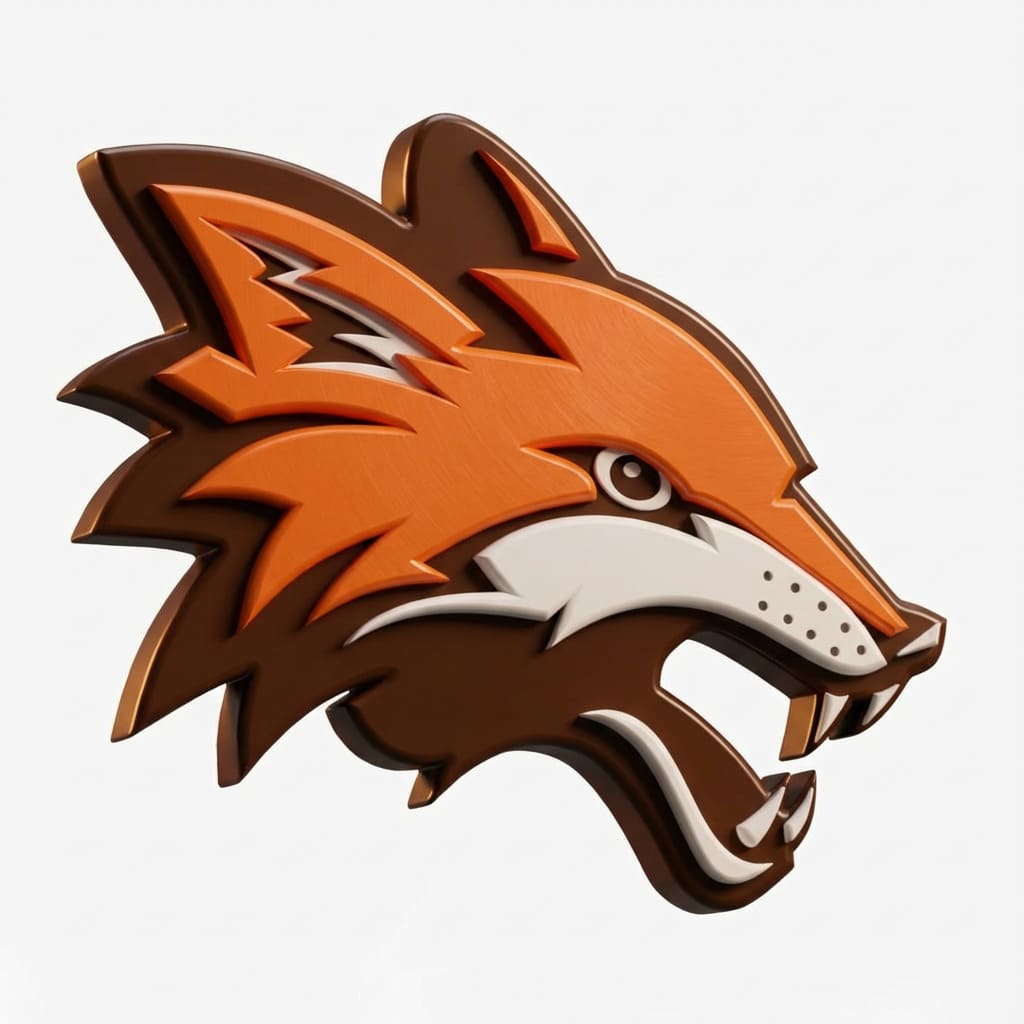
Example 1: Wolf Logo

Before: Flat mascot logo
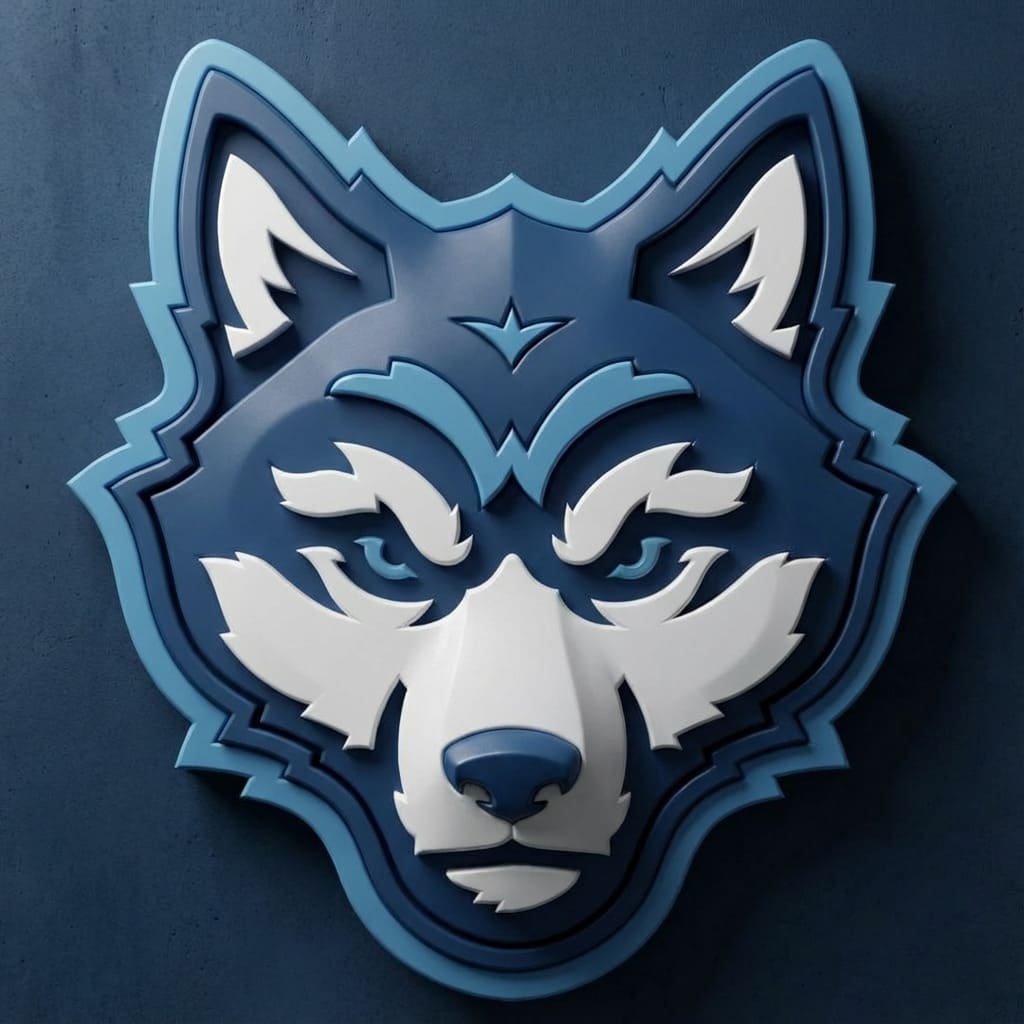
After: With depth and dimension
The edited image with depth cues produces a much better 3D model with proper volume and thickness.
Example 2: Tiger Logo
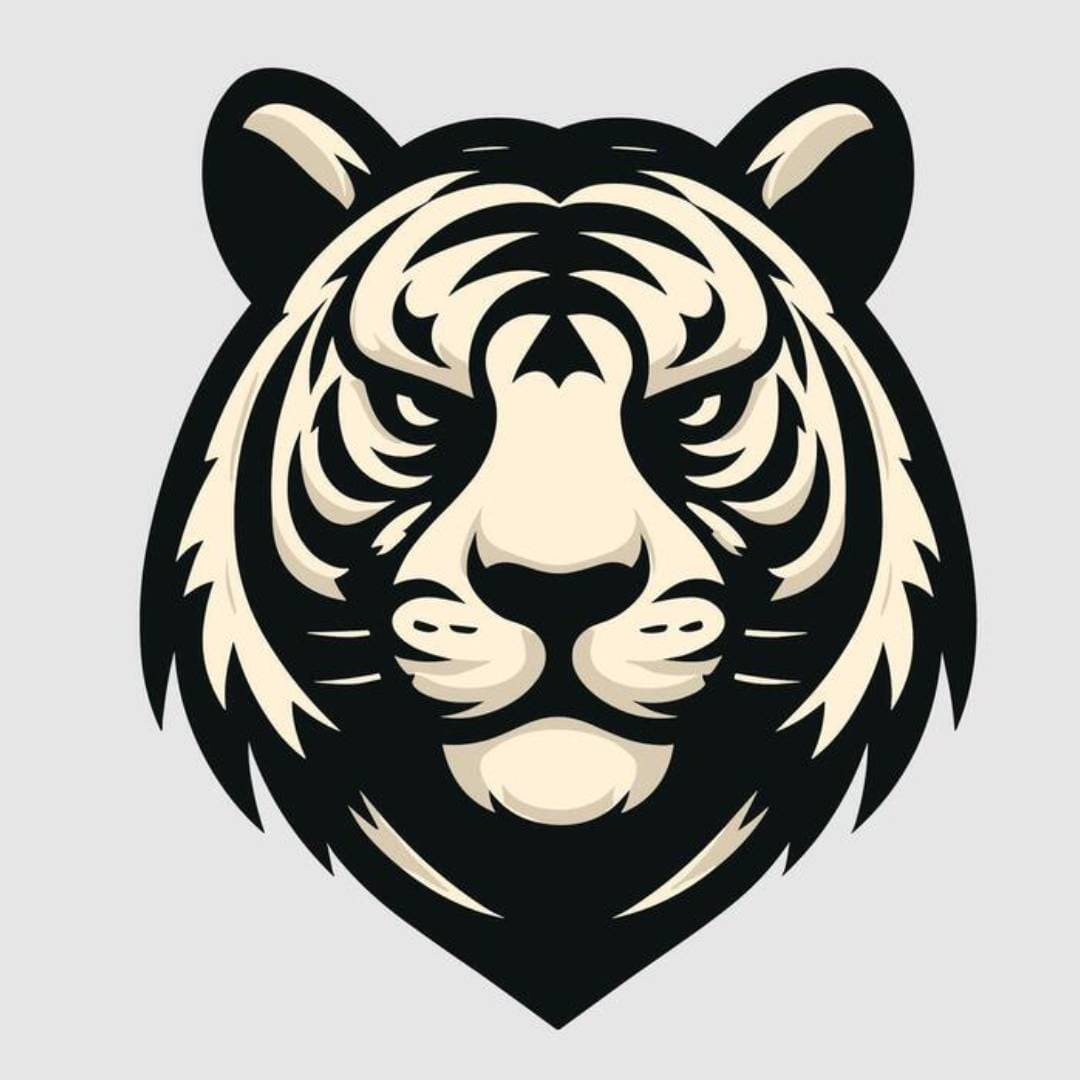
Before: Flat vector graphic

After: Dimensional render style
Notice how the added depth and shadows help the 3D generator understand the form better.
Example 3: Puma Logo

Before: Flat mascot logo
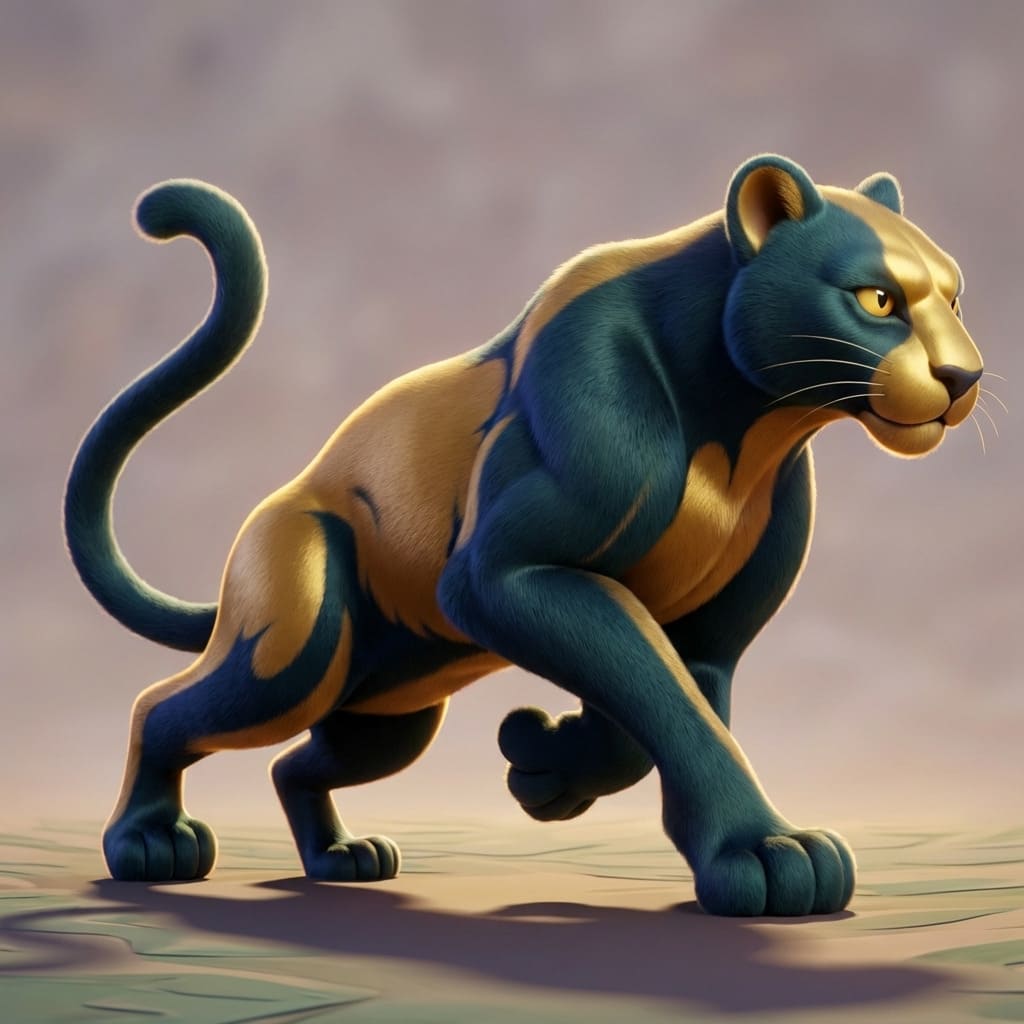
After: With depth and dimension
The transformation adds shadows and highlights that give the AI the depth information it needs.
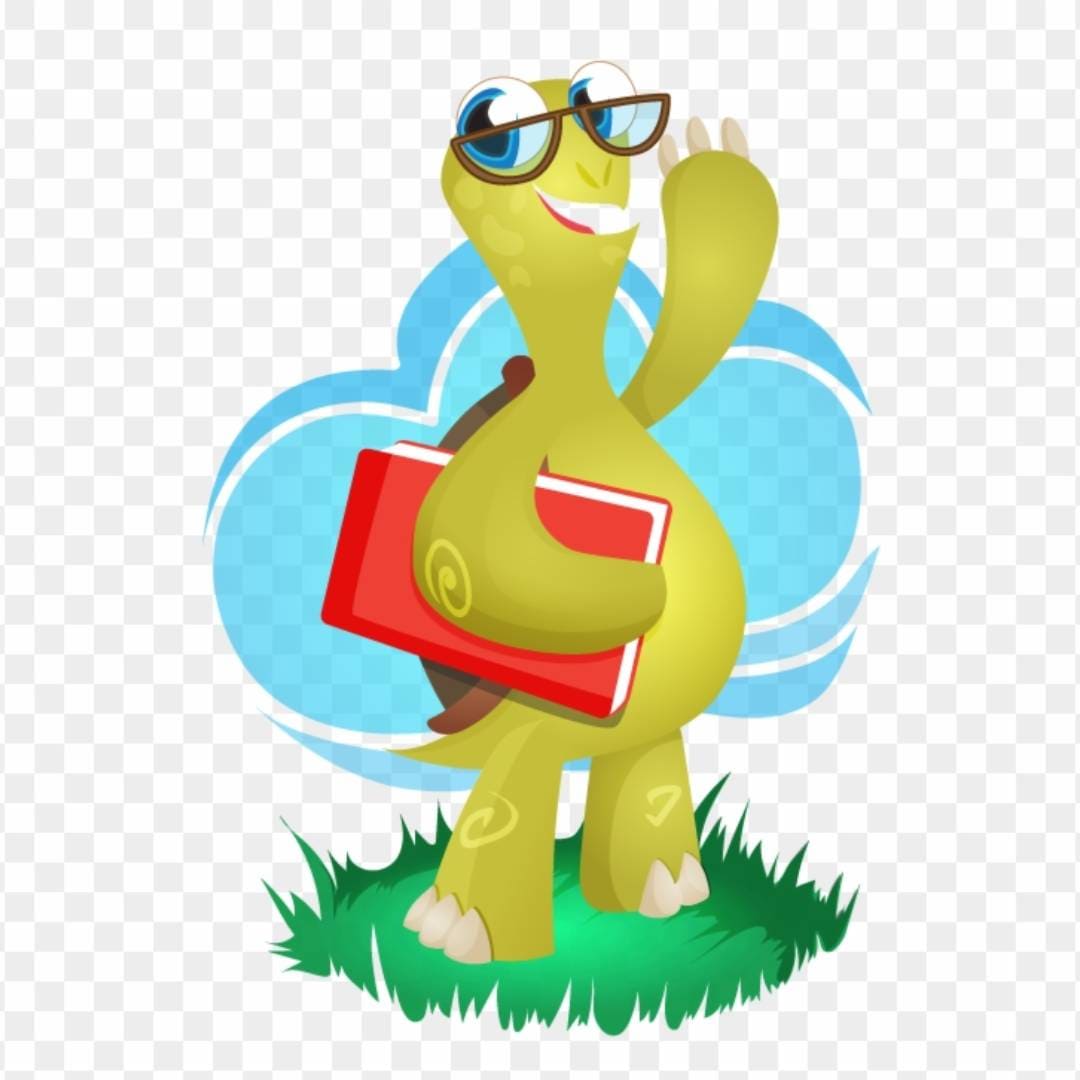
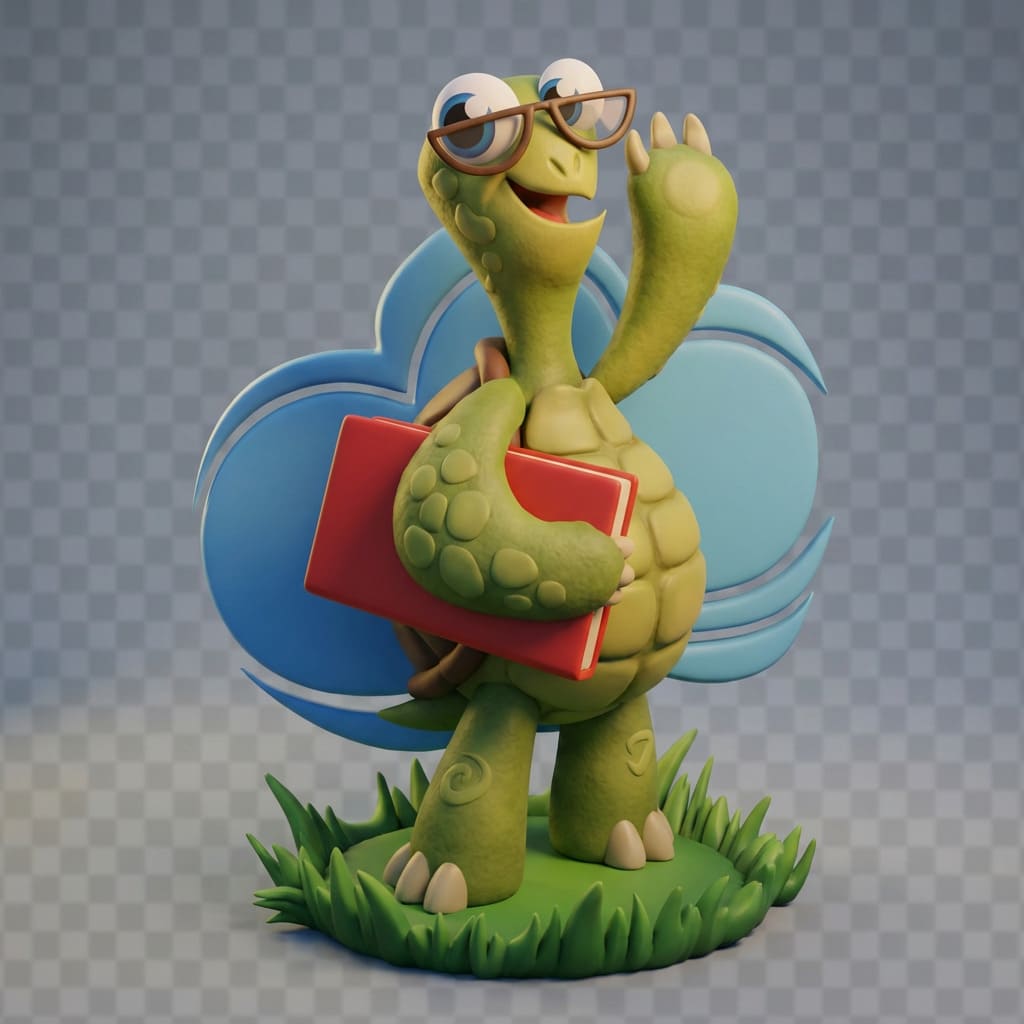
Example 4: Octopus Character
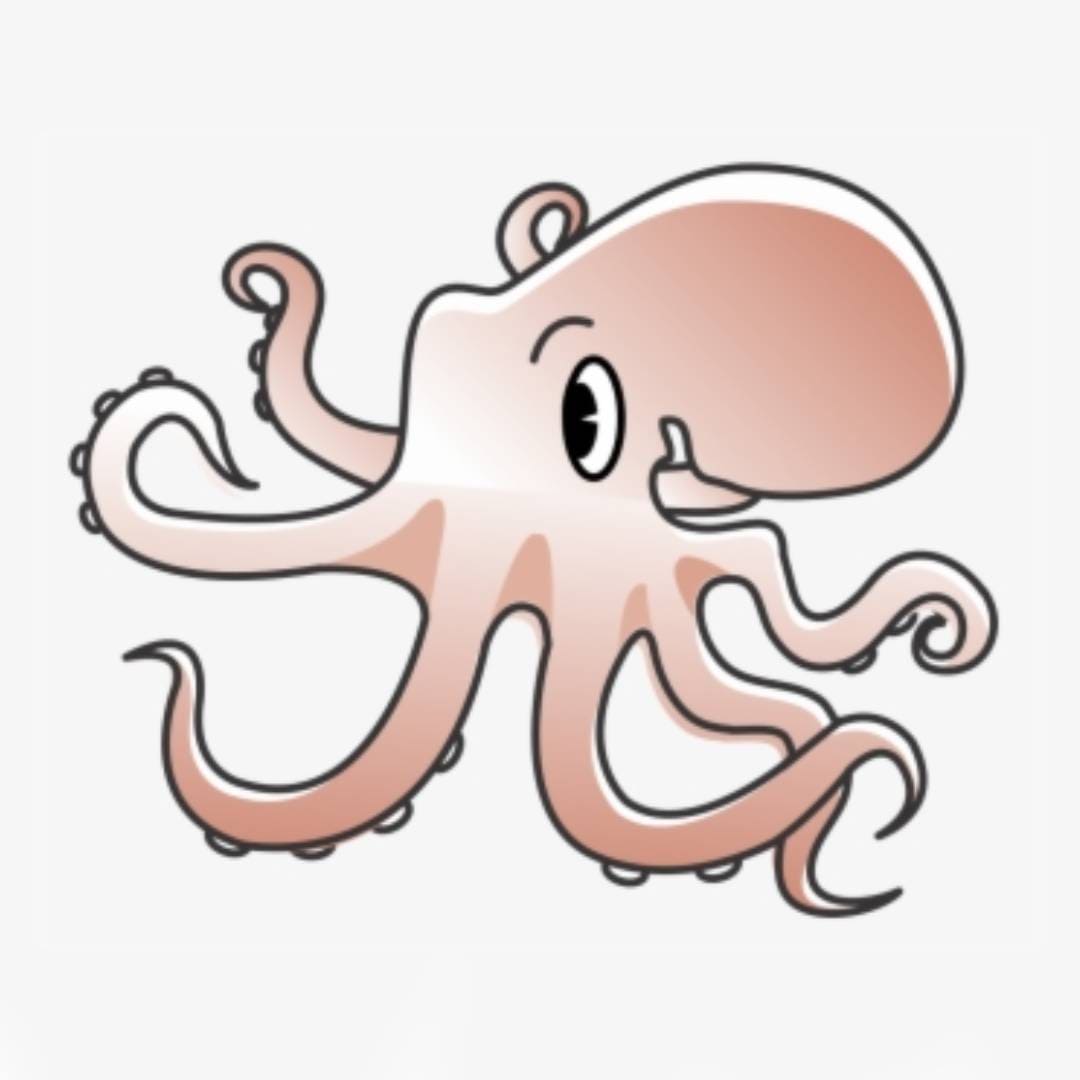
Before: Flat product mockup
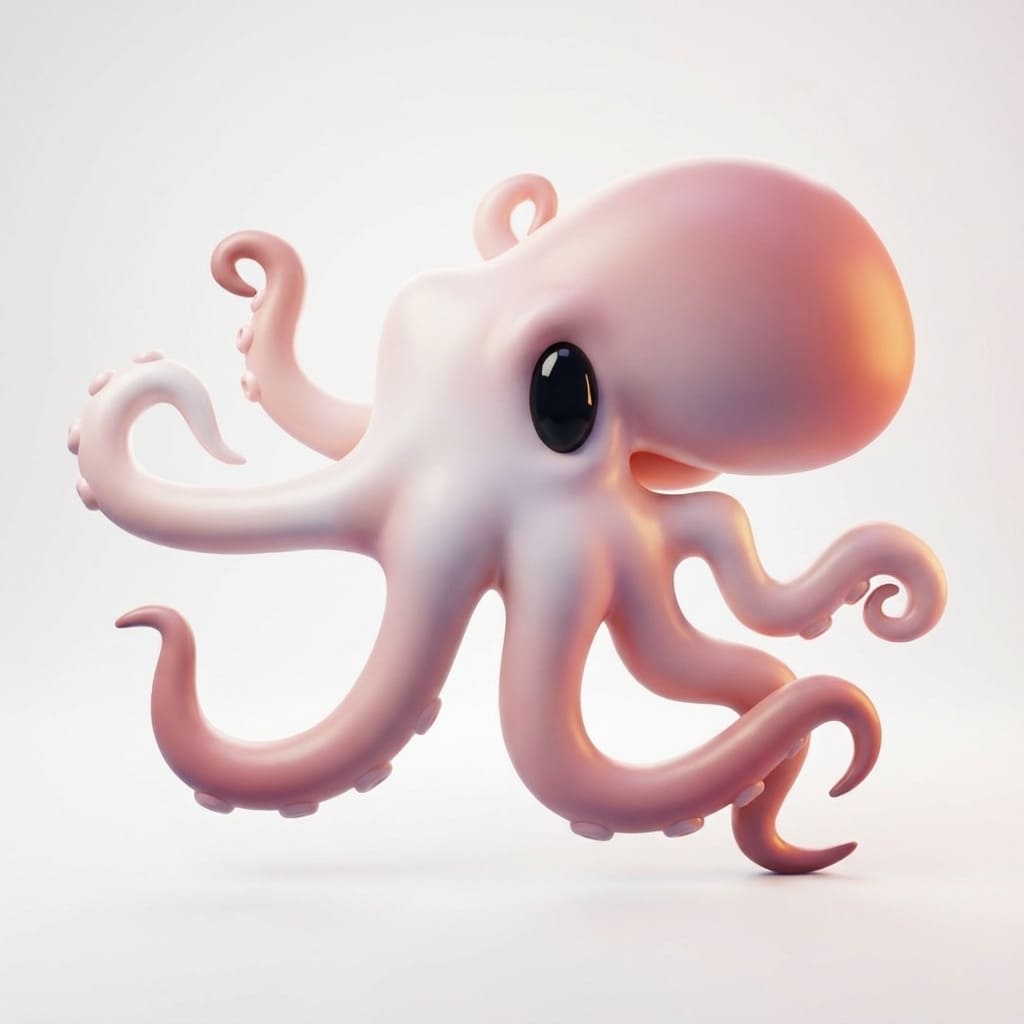
After: Dimensional render style
Even complex characters with multiple elements benefit from this depth-adding technique.
Tips for Best Results
Here are some additional tips to get the best possible results when using this technique:
Be specific with your prompts. Don't just say "make it 3D" - specify that you want a "stylized 3D render" or "3D model render." Mention depth, volume, and dimension explicitly.
Check the edited image before generating 3D. The AI-edited image should look noticeably more dimensional than your original. If it still looks flat, try editing again with a different prompt.
Try different 3D AI models. Some models handle stylized renders better than others. After editing your image, experiment with different 3D generation models to see which produces the best volume.
This works for all types of flat images. Whether you're working with illustrations, drawings, logos, icons, or concept art - if it's inherently 2D, this technique will help.
The Edit Tool Can Do Much More
While this guide focuses on fixing flat images, the AI edit tool is incredibly versatile. Here are some other things you can do before converting to 3D:
- •Upload a photo of yourself and turn it into a tabletop miniature figurine
- •Remove unwanted elements or add new objects to your image
- •Change a character's pose, outfit, or accessories
- •Adjust materials, textures, and surface details
- •Transform between art styles (realistic to cartoon, etc.)
- •Fix composition issues or extend image boundaries
Experiment with what you can create before converting to 3D - the possibilities are endless. Learn more about the Edit tools.
Final Thoughts
Getting flat 3D models from your illustrations is frustrating, but it's completely fixable. By using the "Edit with AI" button to add depth before generating your 3D model, you give the AI the information it needs to create proper volumetric objects.
This simple two-step workflow - edit for depth, then generate 3D - solves the flat output problem 95% of the time. It takes just a couple extra minutes and the difference in quality is dramatic.
Ready to try it? Give this technique a try with your flat images.
Was this guide helpful?
We're a small team and your feedback helps us improve.
Frequently Asked Questions
Why does my 3D model look flat even though I used a detailed image?
The flatness happens when your source image lacks depth information. Even detailed flat illustrations don't have the shadows, highlights, and dimensional cues that AI needs to create volume. The image might have lots of detail, but if it's drawn in a flat style (like logos, icons, or front-facing illustrations), the AI will interpret it as a thin object. Using the "Edit with AI" technique adds these missing depth cues.
Can I fix a flat 3D model after it's already been generated?
Unfortunately, no - you can't add volume to an already-generated flat 3D model through our platform. The best approach is to go back to your original image, use the "Edit with AI" button to add depth, and then regenerate the 3D model. This takes about 2 minutes and produces significantly better results than trying to fix the flat model in 3D software.
What types of images benefit most from this technique?
This technique works best for:
- • Flat illustrations and drawings - cartoon characters, concept art
- • 2D game sprites - icons, UI elements, pixel art
- • Logos and brand assets - company logos, emblems, badges
- • Vector graphics - anything created in Illustrator or similar tools
- • Front-facing artwork - images with no perspective or depth
You don't need this technique for actual photographs of real objects - those already have depth information.
How much do the extra credits for image editing cost?
AI image editing typically costs 5-10 credits depending on the tool you choose. While this is an additional cost, it actually saves you credits in the long run. Without this step, you'd waste 20-30 credits generating a flat 3D model, then spend another 20-30 credits trying again (possibly multiple times). The 5-10 credit investment in editing first prevents wasting 40-60+ credits on failed 3D generations.
Will the AI editor change my design completely?
The AI editor is designed to add depth cues while preserving your original design. However, if you find it's changing too much, you can control this with your prompt. Use phrases like "subtle depth," "keep original style," or "minimal changes" to get gentler results. You can also adjust the strength/influence settings if your chosen editor provides them. The goal is adding shadows and highlights, not redesigning your artwork.
Which 3D AI models work best with edited images?
Once you've added depth to your image, most 3D AI models will work well. However, models like Tripo and Meshy tend to be particularly good at interpreting stylized renders and creating clean topology from them. We recommend trying 2-3 different models to see which gives you the best volume for your specific image type. The edited image with depth cues works across all models, so you're not locked into one choice.
Can I use this technique for batch processing multiple images?
Yes, but you'll need to process each image individually through the "Edit with AI" step. The good news is that once you find a prompt that works well for your style of images, you can reuse that same prompt for similar images. This makes batch processing faster - you're essentially repeating the same two-step workflow (edit for depth, then generate 3D) for each image, which takes 2-3 minutes per image.
Can I edit my image separately before using Image to 3D?
Yes! If you prefer not to use the "Edit with AI" modal within the Image to 3D tool, you can use our dedicated Nano Banana Pro Edit tool directly. Edit your flat image there to add depth, download the result, then upload it to the Image to 3D tool. This workflow gives you more control and lets you save the edited image for future use.
What if I want an intentionally flat 3D model (like a game card)?
If you want a flat, card-like 3D model intentionally (for game cards, tokens, or similar uses), then skip this technique! Just upload your flat image directly and generate. The AI will create a thin model with minimal depth, which is exactly what you want. This guide is specifically for when you want a volumetric 3D object but are getting unwanted flat results.
Does this work for text and typography?
Yes, this technique works great for turning flat text and logos into 3D! Use prompts like "Turn this text into a 3D render with beveled edges and depth" or "Make this logo look like a 3D emblem." The AI editor will add dimensional lighting and depth that helps the 3D generator create proper thickness and beveling instead of paper-thin letters.
How do I know if the edited image has enough depth?
Look for these visual cues in your edited image: visible shadows (especially cast shadows), highlights on edges and surfaces, gradient lighting that suggests form, and dimensional appearance (it should look like it "pops" off the screen). If the edited image still looks completely flat, try editing again with a more explicit prompt like "strong 3D lighting and shadows" or "dramatic depth and dimension."