How to 3D Print a Picture: 4 Easy Ways (2026)
To 3D print a picture, you first turn it into a 3D model, then export it as an STL or 3MF file and print it like any other model. Depending on what you want to hold in your hands, that model can be a full 3D figure made from the photo, a raised relief, a lithophane that glows when backlit, or a flat logo with thickness.
The fastest way to get a real 3D object from a photo is AI: upload the picture to Image to 3D, then prepare the print file with Export for 3D Printing. Here is how each method works, which one to pick and how to get a clean print.
The 4 ways to 3D print a picture
| Method | What you get | Best for | Tool |
|---|---|---|---|
| Full 3D model (AI) | A figure you can hold and view from every side | People, pets, characters, products | Image to 3D |
| Relief | A raised picture on a plaque | Portraits, wall art, gifts | 3D Relief Generator |
| Lithophane | A thin panel that shows the photo when light shines through | Night lights, lamps, photo gifts | A lithophane generator |
| Extruded logo or line art | A flat shape with depth | Logos, signs, keychains, cookie cutters | 3D Line Art Maker |
Quick rule: if you want to see the subject from the side, you need a full 3D model. If the picture is meant to hang on a wall or sit in a frame, a relief or lithophane is simpler and prints faster.
How to 3D print a picture as a full 3D model
This is the method most people mean when they want to turn a photo of a person, a pet or an object into a real figure. AI reads the picture, builds the hidden sides and gives you a textured 3D model you can print.
1. Pick the right picture
The picture decides most of the result. A good one has:
- One clear subject, fully in frame, nothing cut off at the edges
- Even light without harsh shadows or strong reflections
- A plain background, or remove the background before uploading
- Enough resolution, ideally 1024 pixels or more on the short side
- A front or three-quarter view for people and animals, so the face and body proportions are clear
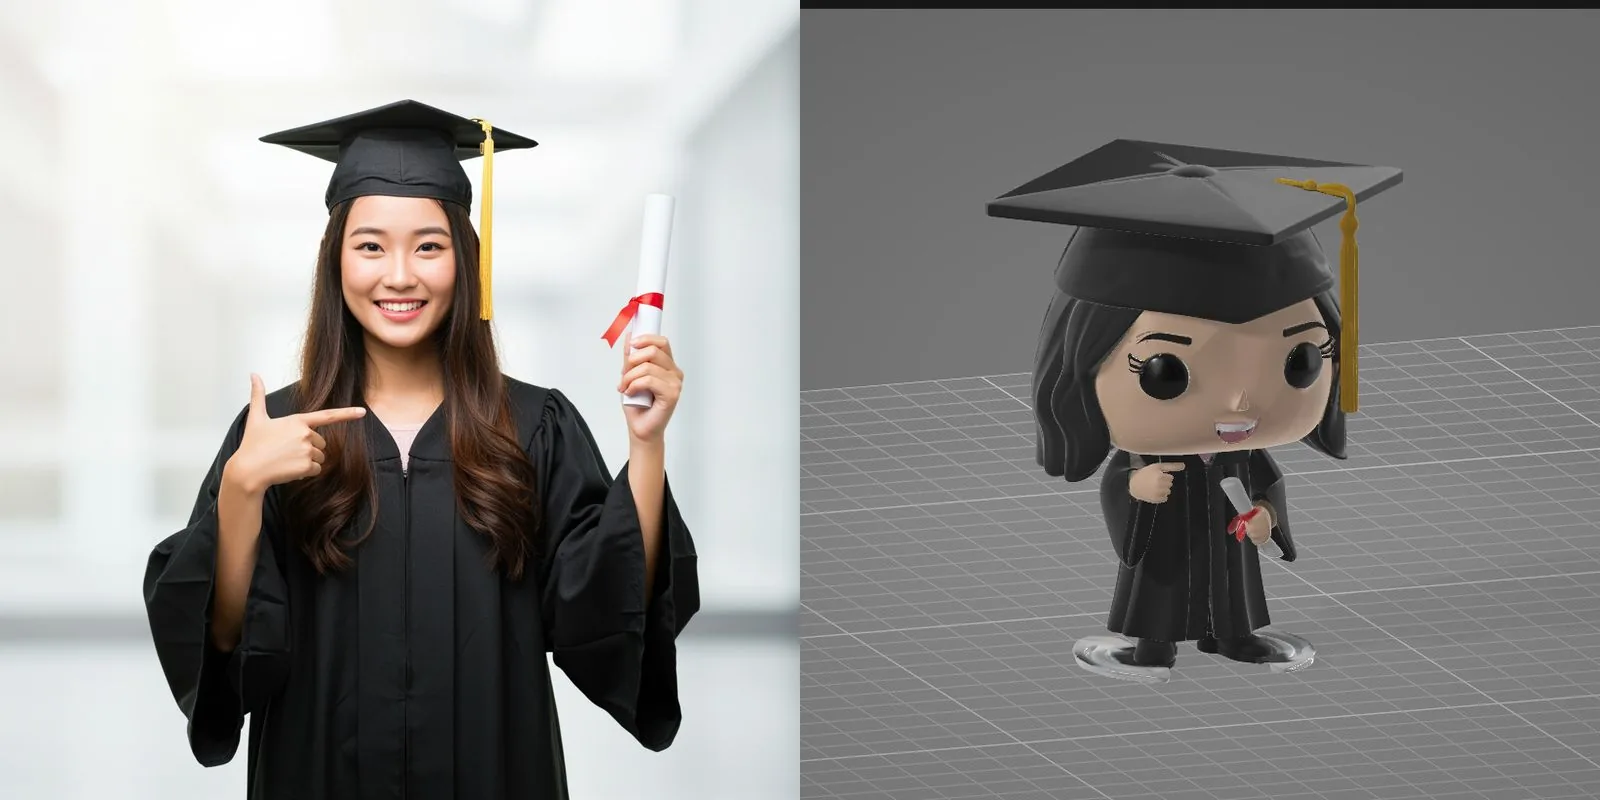
For portraits, a full-body photo works much better than a close-up of a face. If you want a cute collectible look like the graduate above, convert the photo into a figurine style first with the image style converter. Simple, chunky shapes print far more reliably than realistic hair and thin fingers.
2. Turn the picture into a 3D model
Upload the picture to the image to 3D model generator, pick an AI model and click generate. After a few minutes you get a textured 3D model, including the sides the photo never showed.
- One photo is enough. The AI reconstructs the back and sides from what it sees.
- More photos give better shapes. If you have pictures from several angles, a multi-view model rebuilds the real back instead of guessing it.
- It is free to start. Free accounts get 100 credits every month, enough for a few generations.
Starting from a JPG or PNG file and only need an STL? The image to STL converter walks you through the same AI process from a file drop. Model choices, costs and settings are explained in the Image to 3D guide.
3. Make the model print-ready
Open the model in your dashboard and choose Export for 3D Printing. It turns the model into a print file right in your browser, and it handles the parts that usually trip beginners up.
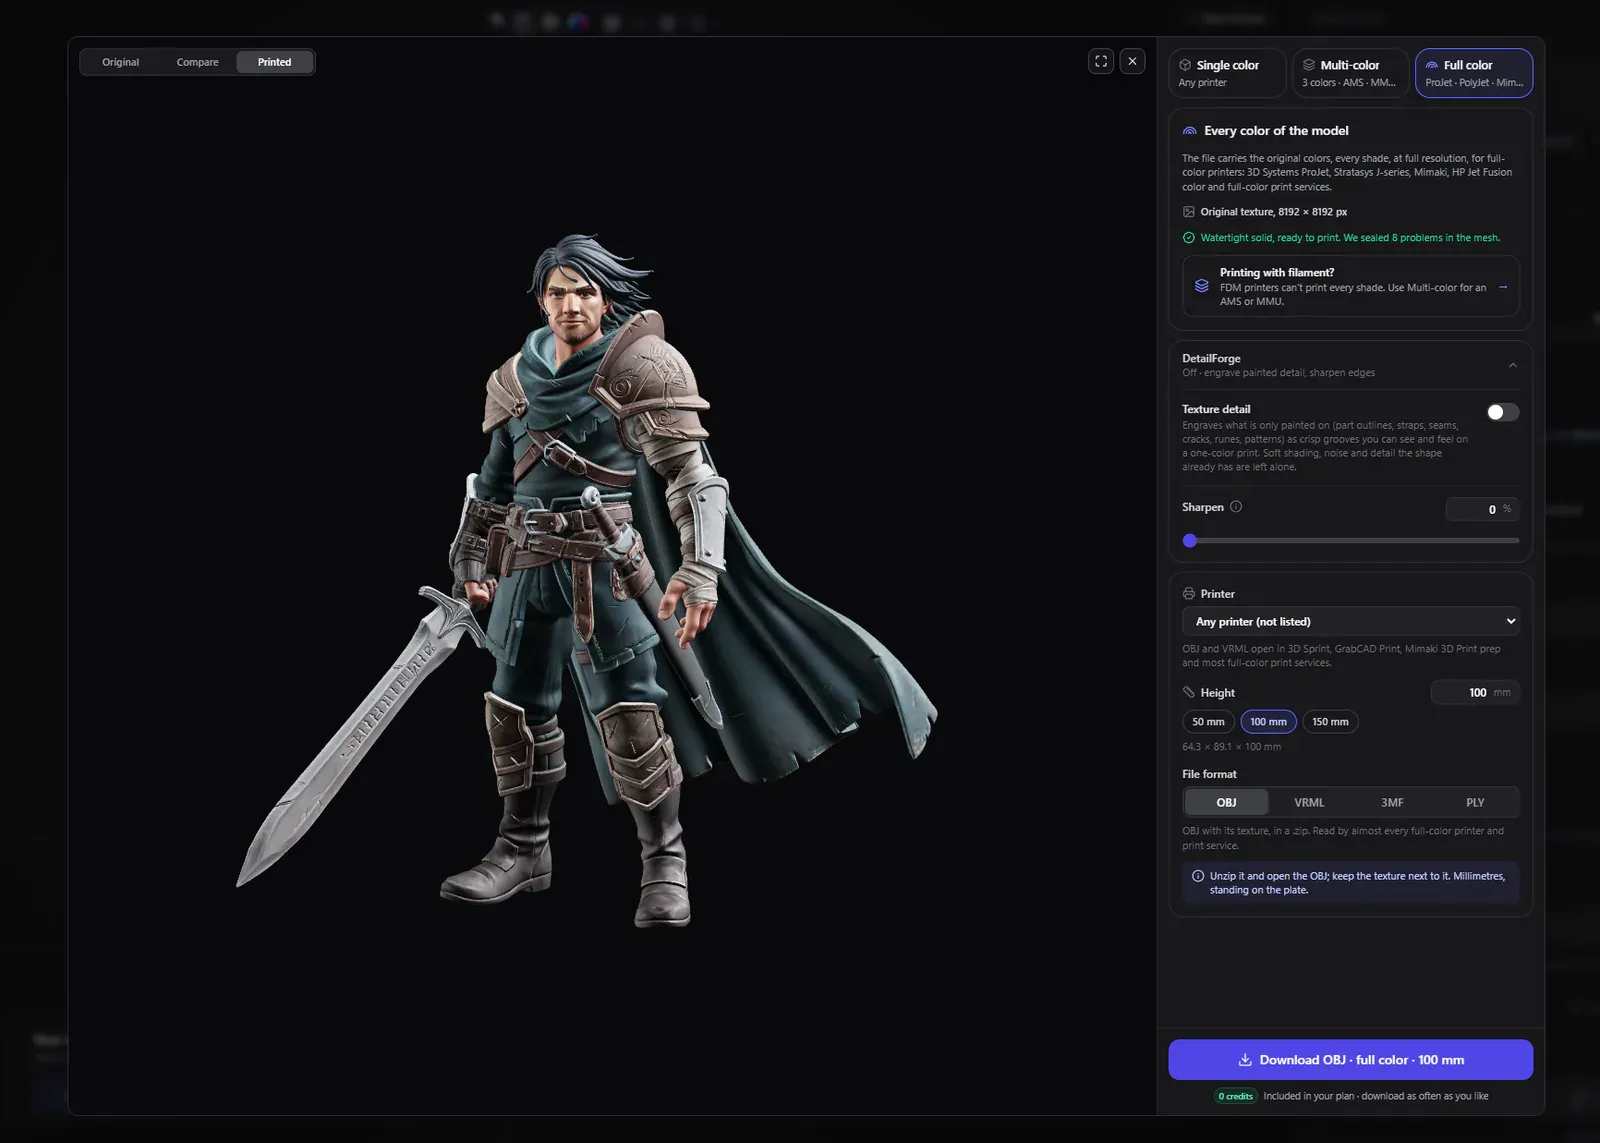
- Watertight automatically: the model is sealed into one closed solid and checked edge by edge, so the slicer does not complain about holes
- Real size: set the exact height in millimeters and pick your printer to check that it fits the build plate
- One color or several: print in a single filament, with up to 8 filaments on an AMS or MMU, or in full color for full-color printers
- Sharper detail: the optional DetailForge step turns painted-on details like outlines and seams into real grooves you can feel
Preparing and previewing the print is free. Download an STL for single-color printing or a 3MF with the filament colors already painted in. The Export for 3D Printing guide covers every setting.
4. Slice and print
Open the file in your slicer, such as Bambu Studio, OrcaSlicer, PrusaSlicer or Cura, and check three things before you print:
- Orientation: stand figures upright on their feet or base
- Supports: add them under overhangs like arms, hat brims and tails
- Layer height: 0.12 to 0.16 mm brings out faces and small details on FDM printers. Resin printers are the better choice for figures under about 5 cm
A one-color print can be painted afterwards with acrylics. Prime it first, and the details from the model show up nicely under the paint.
Should I print the picture in one color or several?
Print in one color if you plan to paint the figure or want a clean statue look. Print in several colors if your printer has an AMS, MMU or tool changer and you want the figure to look like the photo straight off the plate.
| One color | Several colors | |
|---|---|---|
| Printer | Any FDM or resin printer | Bambu AMS, Prusa MMU, tool changer |
| File | STL | 3MF with filament colors |
| Look | Statue, or painted by hand | Recognizable colors straight off the printer |
| Print time | Normal | Longer, every color change takes time and filament |
With several colors, start with 4 filaments. That is what most AMS and MMU units hold, and it keeps faces, clothes and accessories readable without too many color changes.
How to make a relief from a photo
A relief turns a photo into a raised picture on a flat plaque, like a coin or a carved portrait. It is the easiest way to print a face that people recognize, and it prints flat without supports.
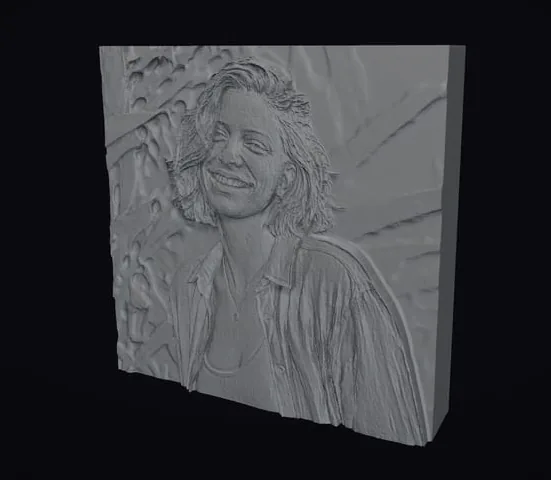
- Upload the photo to the 3D relief generator
- Choose Organic for portraits and natural shapes, or Detailed for objects and logos
- The AI estimates depth from the photo, which costs a few credits (4 with Nano Banana 2)
- Adjust the relief height, smoothing and base thickness for free in your browser
- Download the STL and print it lying flat on the bed
Portraits with good side lighting give the best depth. For wall art, print the plaque in a single light color, which shows the shading of the relief best.
How to make a lithophane
A lithophane is a thin panel where the thickness changes with the brightness of the photo. It looks like a plain white plate until you hold it against a light, and then the picture appears in full detail. That makes it a popular gift for night lights and lamps.
You make one with a lithophane generator: upload the photo, choose a flat, curved or round shape, set the size and thickness, and download the STL. For a good result:
- Print in white PLA so the light passes through evenly
- Use 100% infill, since the panel is thin and the infill pattern would show
- Print the panel standing upright for the smoothest gradients
- Pick a photo with strong contrast, because low-contrast images look flat when lit
How to 3D print a logo or drawing
Logos, signs and line drawings don't need AI depth. They are extruded: the shape is pushed up into a flat 3D part with an even thickness.
- Drawings and logos as images: the 3D Line Art Maker turns a PNG or JPG into a printable STL for free, right in your browser
- Vector logos (SVG): the SVG to 3D converter extrudes clean vector shapes with adjustable depth
- Names and lettering: the 3D text generator turns any font into a 3D model
These are perfect for keychains, desk signs, cake toppers and cookie cutters.
Common problems and how to fix them
| Problem | Cause | Fix |
|---|---|---|
| The slicer reports holes or errors | The mesh is not closed | Prepare it with Export for 3D Printing, which seals the model automatically |
| The back of the figure looks wrong | The photo only shows the front | Use photos from several angles with a multi-view model |
| Thin parts break off | Fingers, hair or weapons are too thin at small sizes | Print larger, use resin, or pick a simpler figurine style |
| Faces look blurry | The print is too small for the layer height | Print taller, lower the layer height, or use a resin printer |
| The relief looks flat | The photo has flat, even lighting | Use a photo with side light and more contrast |
Get started
Pick your favorite photo, turn it into a 3D model with Image to 3D, prepare the file with Export for 3D Printing and send it to your printer. For more ideas and ready-made workflows, see AI 3D models for 3D printing.

Generate 3D models with AI
Easily generate custom 3d models in seconds. Try it now and see your creativity come to life effortlessly!
FAQ
Can I make a 3D print from a photo?
Yes. Turn the photo into a 3D model first, then export it as STL or 3MF for your slicer. AI tools like Image to 3D in 3D AI Studio build a full 3D figure from a single photo in a few minutes, and a relief generator turns it into a raised picture plaque.
How can I convert an image to a 3D print file for free?
For logos and line drawings, the free 3D Line Art Maker turns the image into a printable STL in your browser without signup. For a full 3D figure from a photo, 3D AI Studio gives free accounts 100 credits every month, enough for a few generations, and preparing the print file is free.
Can you 3D print a picture of a person?
Yes. Use a sharp, front-facing photo that shows the whole person. AI turns it into a 3D figure, and converting the photo to a figurine style first gives a cute, printable result with simple shapes that print reliably.
Can you 3D print with just a phone?
You can do everything except the printing on a phone: take the photo, generate the 3D model and download the print file in the browser. To print it, you need a 3D printer or an online 3D printing service.
How long does it take to 3D print a picture?
Making the 3D model takes a few minutes. The print itself takes from about an hour for a small relief or figurine to a day or more for a large, detailed one, depending on size, layer height and printer.
Do I need to know 3D modeling?
No. AI handles the 3D modeling, and Export for 3D Printing makes the model watertight and sets its size automatically. You only need to pick a picture, choose the size and slice the file for your printer.